Have you encountered the Ryobi battery charging issue while working on an urgent and important task? When this mishap occurs during the peak of your productivity, you naturally lose your temper and curse your battery. Hey, don’t panic, and don’t scratch your head with frustration about what you can do now.
Ryobi power tool is a flagship brand that is brought up under the umbrella of the Techtronic industry. It’s a trustworthy power tool brand that is unrivaled among its peers and competitors. As far as the battery charging issues are concerned, occasionally, the power tools refuse to stay with you in the long run. But remember, sometimes your own careless actions result in severe issues.
Fortunately, before rushing to buy the new one, you can manage to revive it again. So, if your Ryobi battery is not charging, stick with us to explore the quick fixes that save you time and cost as well.
Ryobi Battery Not Charging – Reason
The main reason behind the Ryobi battery not charging might be the malfunctioning power outlet, dirty/rusted metal contacts of the battery/charger, sleep mode, extreme temperature, entirely running out of power juice, and dead condition.
Troubleshooting: Battery Indicator Lights
The latest 18V and 40V Ryobi batteries come with an integrated onboard LED fuel gauge. This gauge empowers you to see the battery status while charging or discharging. You just have to press the button under the battery icon, and a light illuminates that keeps you aware of the remaining run time in the form of battery cells, as you see on your cell phone.
Ryobi Battery Charger Indicator Lights
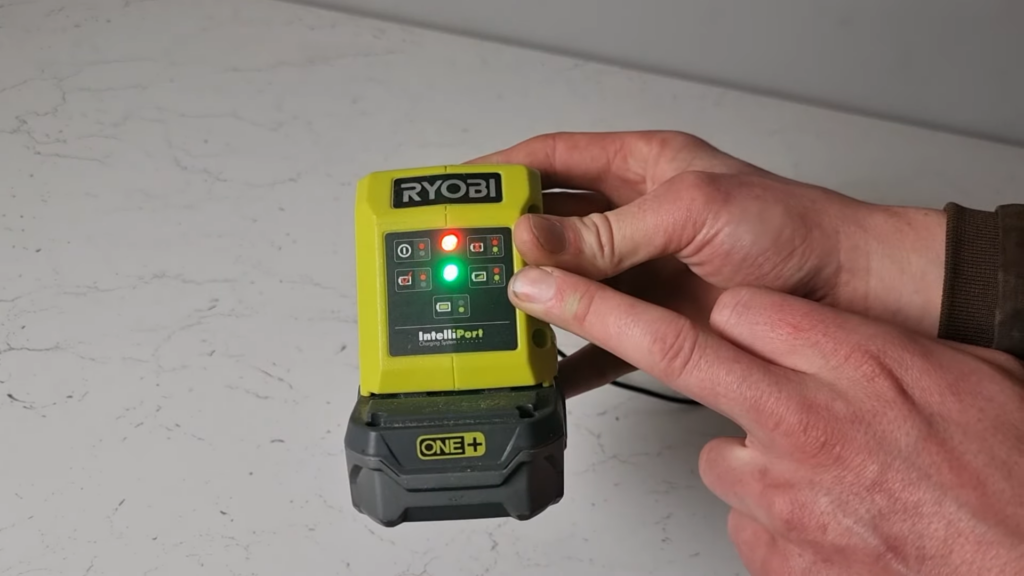
Ryobi battery charger comes equipped with power status LED light indicators. If you want to know about the functionality of your charger, you should know the main role of these lights for indication. The whole game revolves around the main lights (red & green). In some indications, these two partners illuminate simultaneously, and in some conditions, they work separately.
Let’s have a look at their functionality:
1- Red (Solid)
When you plug the charger into the wall socket and the current flows into the charger, the solid red light illuminates. It’s just n indication of power on your Ryobi charger even before inserting the battery.
2- Red (Flashing)
When you insert your battery into the charger, and it doesn’t hold charge soon after inserting th,e red light begins to flash, indicating that there is a delay due to extremely hot/cold temperature and the entirely discharged position of battery cells. It’s a temporary delay that resumes after the pre-charging phase is done and moderating the battery temperature.
3- Red (Solid)+Green (Flashing)
When your battery is perfectly holding a charge, the solid red light remains illuminated, plus the green light flashes continuously till the battery is fully charged.
4- Green (Solid)
When your Ryobi 18V/40V battery is charged fully, the solid green light indicates the power status and removal of the battery as soon as possible.
5- Red & Green (Flashing) Simultaneously
When soon after inserting the battery into the charger, the red and green light starts flashing simultaneously. It’s a warning of an error in charging. There might be a charging issue with the battery, or the charger might be faulty.
4 Quick Fixes
To get the best out of your power tools, you need to learn how to manage the minor issues that you might encounter while using them. The knowledge of basic issues and their possible solutions saved you from the hassle and spending the extra cost of replacing them.
Here we come up with 4 quick fixes that enable you to fix your Ryobi 18V and 40V batteries if not charging.
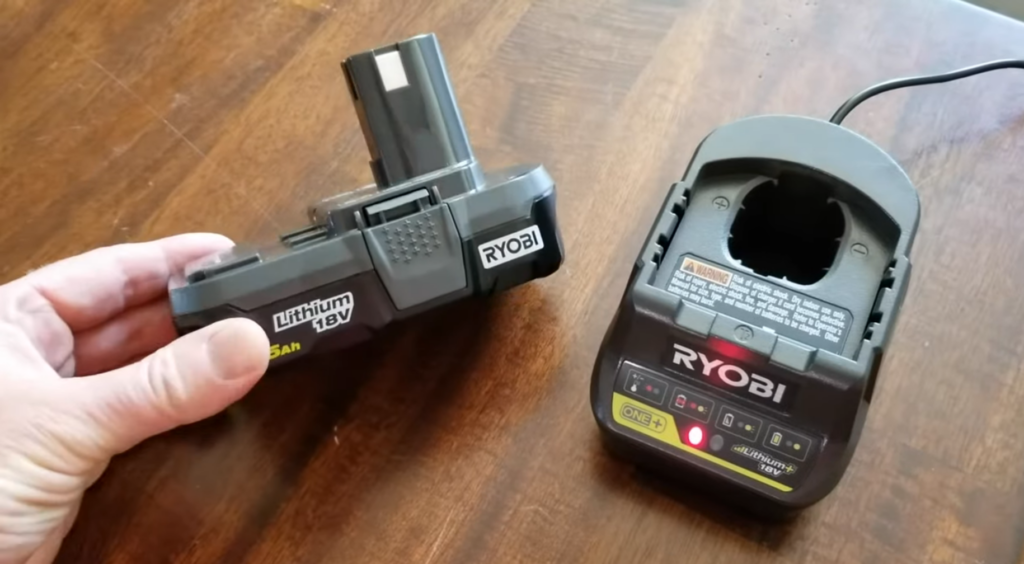
First of all, plug in the charger to the wall socket and insert the battery properly. If the charger is not powered on, check the functionality of your power outlet. Alternatively, plug in the charger to another wall outlet. If the charger is still not getting power, your charger may be faulty.
If the charger is powered on but, unfortunately, the battery is not holding a charge, insert another battery to check the functionality of your charger. If the other battery holds charging accurately, your former battery is faulty. Comparatively, if the other battery fails to hold the charge, it means your charger is accused.
After checking these primary requirements, you need to jump over the analyses of the main issues and try to fix them.
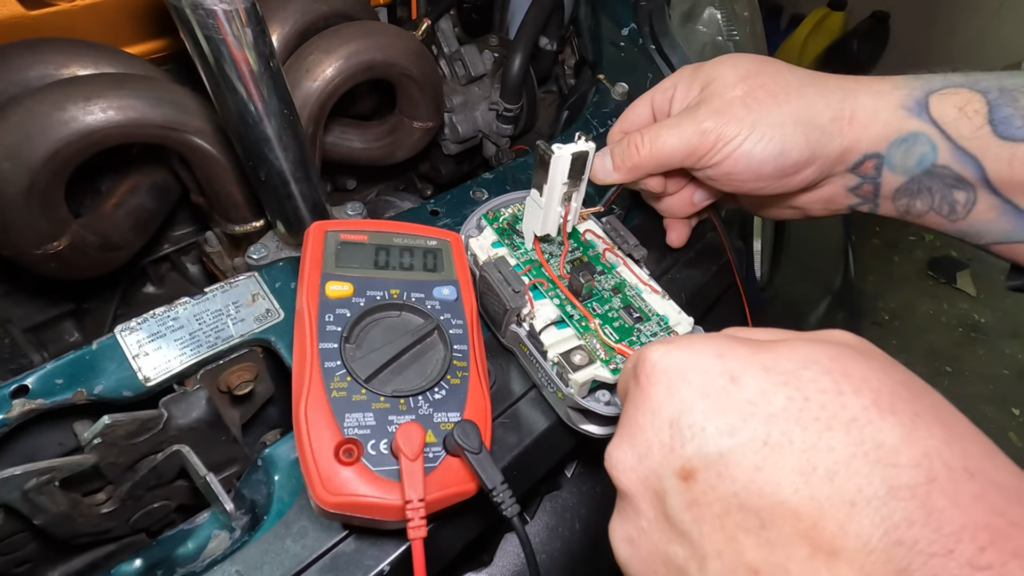
Fix # 1: Rustic/Dirty Metal terminals of Battery/Charger
The rustic and dirty metal contact of the battery is the main culprit that hinders the holding battery charging. When the metal terminals don’t contact properly, the charger is unable to induce power juice to the battery. Therefore, for a quick fix, follow these steps below:
- Gather the cleaning material that includes Q-Tip, rubbing/propyl alcohol, sandpaper, and soft white cloth.
- Switch off your charger and remove the battery from the charger.
- Dampens the Q-tip into liquid alcohol and gently rub to the charger metal terminals.
- In the case of corrosion buildup, use sandpaper and rub quickly but softly.
- Similarly, apply the process to battery terminals.
- Rinse them thoroughly with a white cloth to see if any dust/rust crumbs remain.
- Then re-insert the battery; amazingly, this method works well.
Pro Tip: handle the intricate metal terminals with soft handed and make sure to dry them completely before re-inserting the battery into the charger.
Fix # 2: Extreme Temperature Conditions/Entirely Discharged Mode
The extreme temperature of the Ryobi battery as well as the entirely discharged mode is responsible for creating an error while charging.
Extreme Temperature
When your battery is too hot or too cold, it’s not capable of holding charge immediately until it doesn’t reach a moderate temperature. This is known as a hot/cold delay in batteries.
Therefore, before charging, check your battery temperature, then insert it into the charger. When you use your power tool continuously, the battery cells begin to heat up, and after discharging, you run after to charge it; it’s absolutely the wrong way.
Although the Ryobi latest chargers come with innovative technology that warns you about the hot/cold charging delay by illuminating a flashing red light and automatically charging when the battery reaches room temperature.
Entirely Discharged Mode
Similarly, when you suck the last drop of power juice from your Ryobi battery, the charging process is delayed and doesn’t start soon after you connect it to the charger. After a while, when the pre-charging process completes, the battery starts charging automatically.
Pro Tip: These delays are not serious issues; they are just resolved by chargers and batteries automatically after a few minutes. Therefore, in this regard, patience is the best fix you have to adapt.
Fix # 3: Boost your Battery with Tiny Bumps
When you store your battery in an idle position for extended periods, the battery automatically loses power gradually. If you don’t charge it off and on. It goes into sleeping mode. Hence, it doesn’t show any sign of life when you want to charge it after a long time.
As a result of its dead condition, you also lose hope of reviving it and plan to replace it. Hey, enthusiasts! Wait for a while; give it some jerks before making any final decision. Here you can go with these simple steps that help you meet your fully functional Ryobi 18V/40V battery.
- Plug in the charger to the power outlet.
- Insert the battery properly into the charger until you hear an audible click.
- Count 3-5 seconds and remove the battery.
- Again repeat the same process.
- Repeat this process 5-7 times.
- These tiny bumps enable your battery to recognize the power of the charger.
- These bumps induce new life to your dead battery.
Note: If, despite applying all the above methods, your battery still fails to hold the charge, try the next fix; it may work wonderfully.
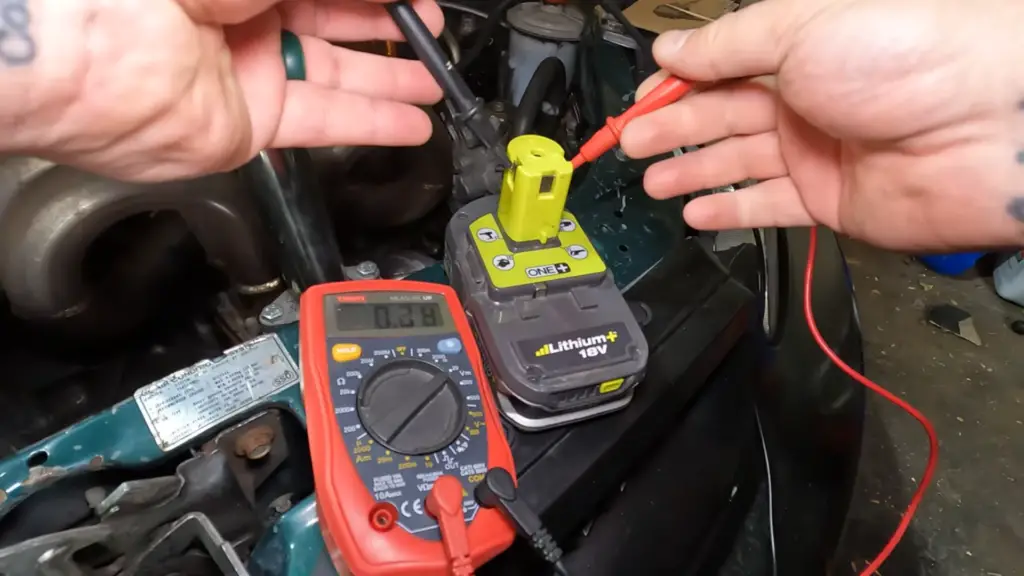
Fix # 4: Power Juice from Healthy Battery
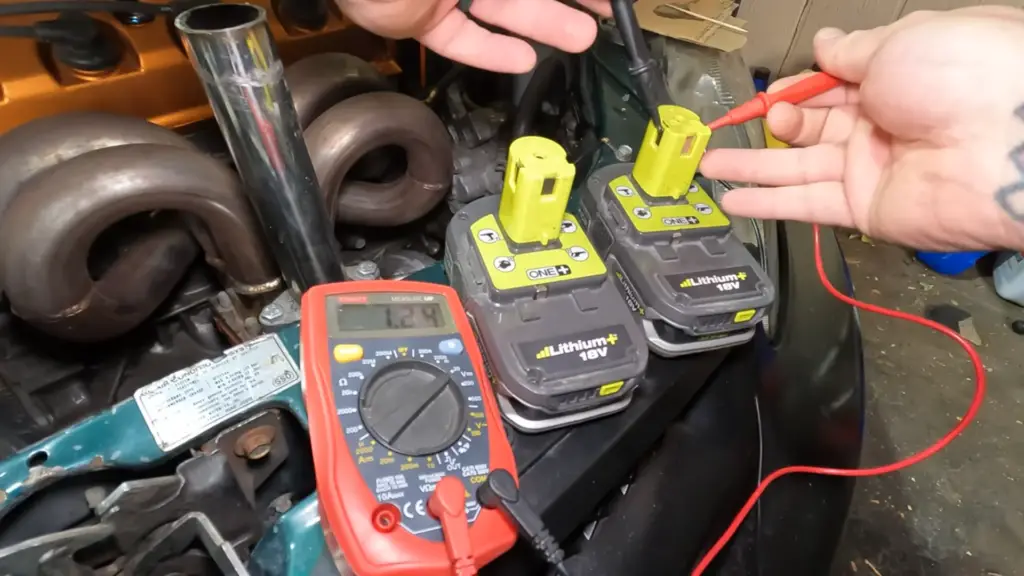
This method works greatly as you do with your car battery. If your battery is dead and doesn’t have a single sign, don’t be frustrated. Here is a solution that can induce the new soul to your dead battery. It would be another live and healthy battery.
What you have to do, is just follow these step-by-step instructions:
- Take your dead battery and a healthy live battery as well.
- Put on both batteries side by side.
- Take two insulator/speaker wires to connect both batteries.
- Strip off the wires from both ends to appear the metal wires from the rubber cover.
- Connect the negative (black) wire to attach the negative to the negative terminals of both batteries.
- Similarly, Connect the positive (red) wire to attach the positive to positive terminals of both batteries.
- After a few seconds of building this power bridge between both batteries, the power juice of a healthy battery starts converting to a dead battery, and as a result, it revives again.
Pro Tip: for better power juice sucking, make sure both batters should have similar Voltage and ampere, and positive-positive and negative-negative connection should be accurate.
Not Fixed Yet (How to reset Ryobi battery)
In the case of failing all the fixes, you can try this last one by resetting your battery. If you do not know how to reset your Ryobi battery, follow these steps:
- Remove your battery from the charger or the tool.
- Press and hold the power/release button until 4-5 seconds.
- Repeat this method 3-4 times.
- It enables your battery to release residual power and reset the interior circuit.
- After releasing the button, put it on a charger and fix it well to connect the terminals properly.
- See if this methodology works or not.
Pro Tip: if the resetting method works well, congratulations! But in another case, go to the professional technician and seek help from Ryobi customer care services if it falls in the guarantee period.
Frequently Asked Questions
1- How do I get my Ryobi battery out of sleep mode?
To get your Ryobi battery out of sleep, you should give it tiny bumps by inserting it in and removing it from the charger frequently 5-7 times. Gradually, it starts adapting power slowly and returns from sleeping mode to active mode again.
2- Why is my Ryobi battery not charging, flashing red and green?
When the red and green lights both flash simultaneously, it’s an error indication. There is a possibility of a malfunctioning charger or battery. You should have checked the functionality of both of them separately to fix the error.
3- How do you revive a battery that won’t charge?
To revive your battery that won’t charge, you can go for jump-start your battery by providing it power juice from other healthy batteries. It’s the best and most effective way that works wonderfully to induce a new soul to your dead battery. For a detailed process, follow the steps of fix # 4 in the above section.
Conclusion
If you are a big fan of Ryobi power tools and are used to having a wide range of lines up at your workshop, you should know about the ins and outs of them. If you want to maximize the potential of your power tools, you should know why your Ryobi battery not charging and what are the causes and solutions you can apply to get optimal performance.
If you are facing any issue, let this fixes a try, you may have better results without any technical knowledge. So be tech-savvy with this valuable piece of information.