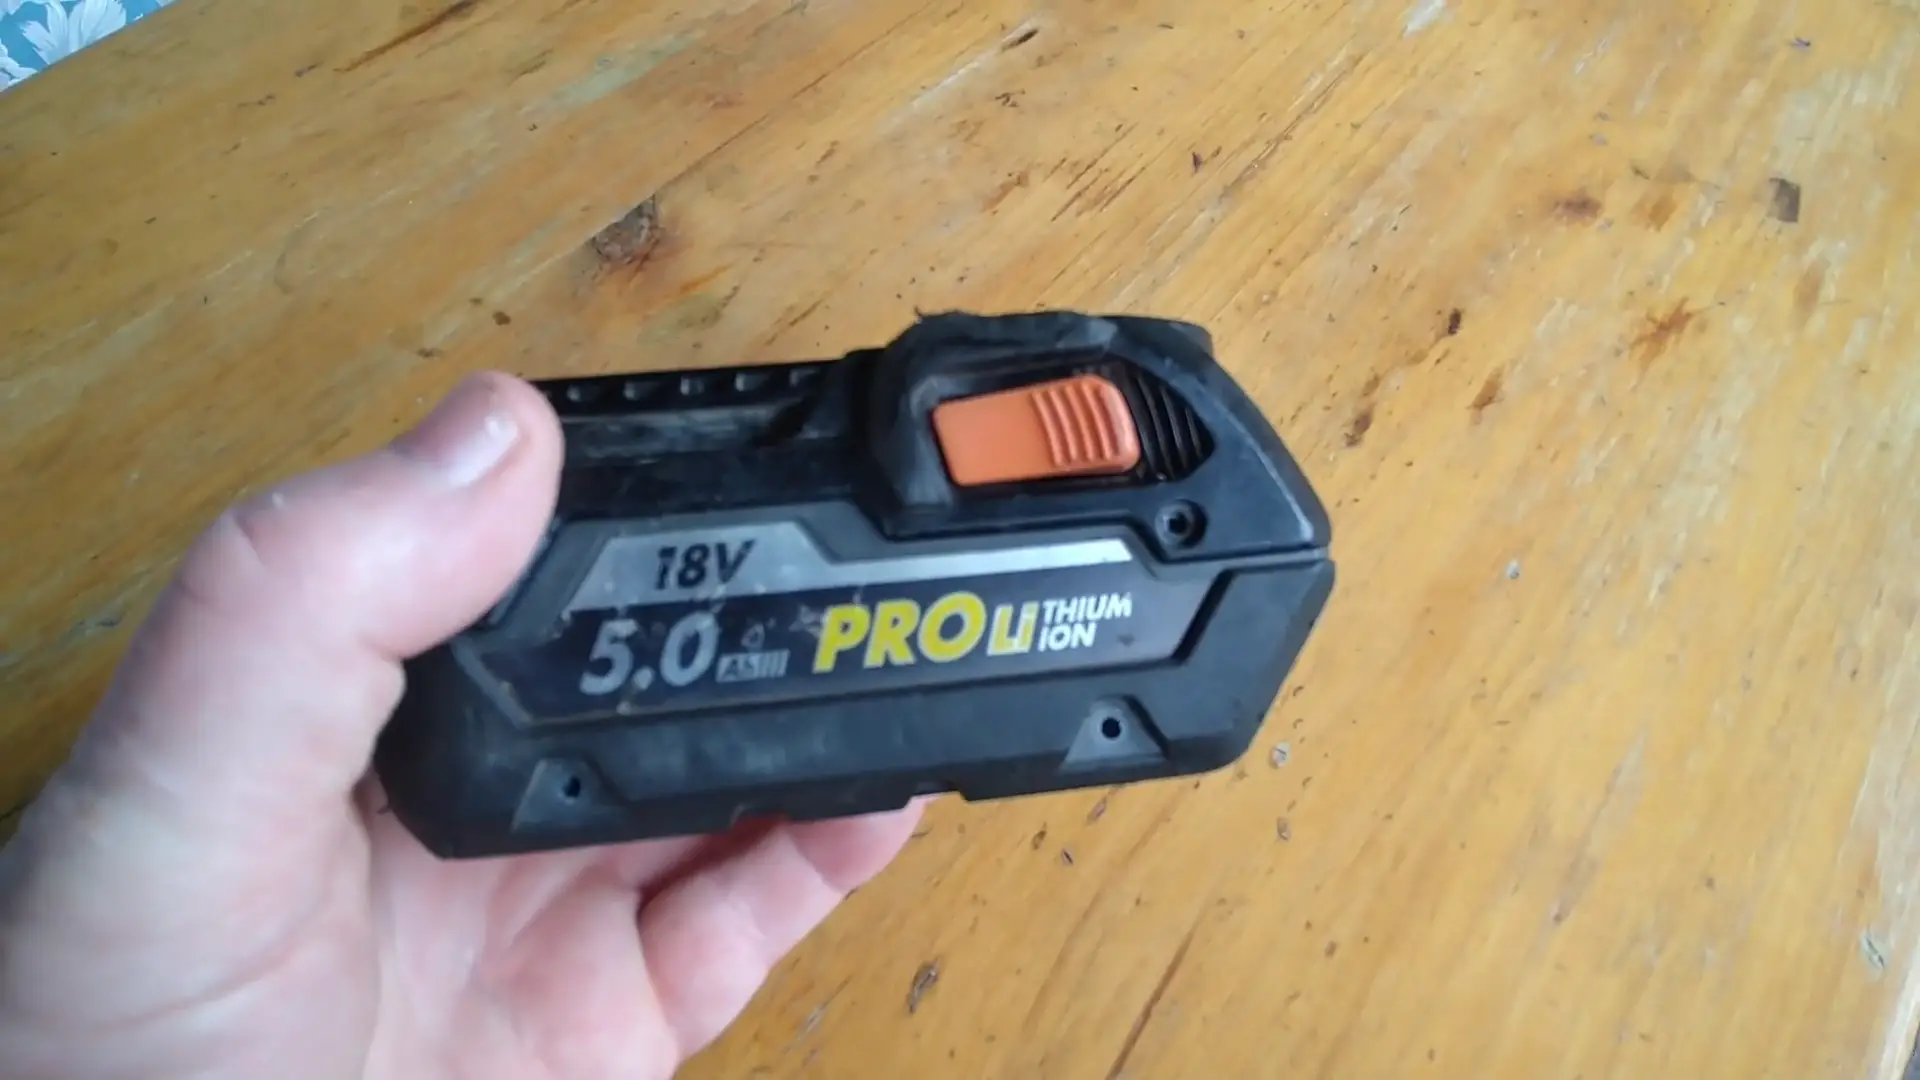
Ridgid 18V battery revolutionized the power tool industry. The battery-powered tools make your work easier, more convenient, and more mobile than ever. The rigid 18v batteries not only facilitate you to accomplish your tasks but also frustrate you when they are out of order.
As with all technology, battery-powered tools can suffer from issues, and a battery that won’t charge is one of the most common.
Is your Ridgid battery not charging? It’s not a big deal. In this article, we will discuss 7 quick fixes that will restore power to your battery in no time. This definitive guide will help you to overcome the culprit behind these issues.
Let’s get started so that you can get back to your work as soon as possible.
Why is Your Ridgid Battery Not Charging?
Several potential causes may be involved in this issue. Battery contacts can become dirty, corroded, or clogged with debris, preventing them from connecting to the charger. It could be the faulty charger that creates the problem if the battery is not charging when connected to the charger.
A battery may stop charging as a result of overheating, or it may be defective. It is also possible for batteries to lose their capacity to hold a charge over time because they have a limited lifespan.
Troubleshooting – Ridgid 18v Battery
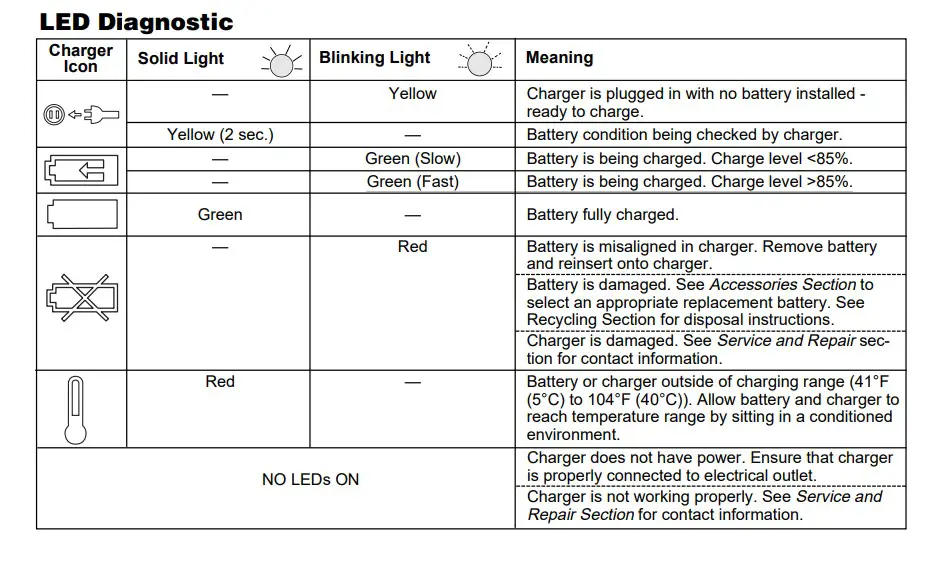
While troubleshooting, you may be confused by the various lights on your Ridgid 18V battery charger. To assist you in understanding the different lights, we have explained their functions:
1. Green Light
When your 18V Ridgid battery charger displays a green light, it functions correctly, and your battery is usually charged.
2. Flashing Green Light
Flashing green indicates that the battery is in charge or half charged.
3. Solid Red Light
An uncharged or empty battery indicates a solid red light.
4. Flashing Red Light
The charger’s flashing red light indicates a defective battery. Overheating, dirty contacts, and faulty components can lead to a malfunctioning battery.
5. Solid Orange Light
The orange color signifies a partially charged battery. It will take longer to charge the battery when the light remains orange.
6. Flashing Orange Light
Orange flashing lights on an 18v charger indicate that a battery is charging abnormally. There is a possibility that the battery is damaged or the charger is malfunctioning. The battery should not be used if the orange light continues to flash.
7 Quick Fixes for Ridgid Battery Not Charging
To make the work simpler and more convenient for you, through our extended research, we have come up with quick and easy solutions. These solutions enable you to fix the potential issues of your Ridgid battery not charging and recover it efficiently.
Fix # 1: Check the Power Outlet
A malfunctioning 18V Ridgid battery can often be caused by a faulty power outlet. Faulty power outlets can cause the battery charger to malfunction, preventing it from charging the battery. A simple and quick way to check the power outlet is by using an electrical tester.

Alternatively, you can try plugging another electrical device into the outlet where the battery charger is plugged in. An outlet that does not provide power to the other device is faulty and must be replaced. Conversely, if the other device receives power, the outlet is working properly, and the issue may be with the battery or charger.
If this happens, it is recommended to try using a different power outlet to see if the battery charger works. To check the functionality of your charger, try out another outlet. To do this, unplug the adapter of your charger from the faulted outlet and plug it into another power outlet in the same room or any other room.
In the event that your battery starts charging when you connect it to a different outlet, the problem is probably with the original power outlet, which needs to be replaced. If the battery still doesn’t charge after connecting to different outlets, the charger or battery may malfunction.
Fix # 2: Test If Charger is Working
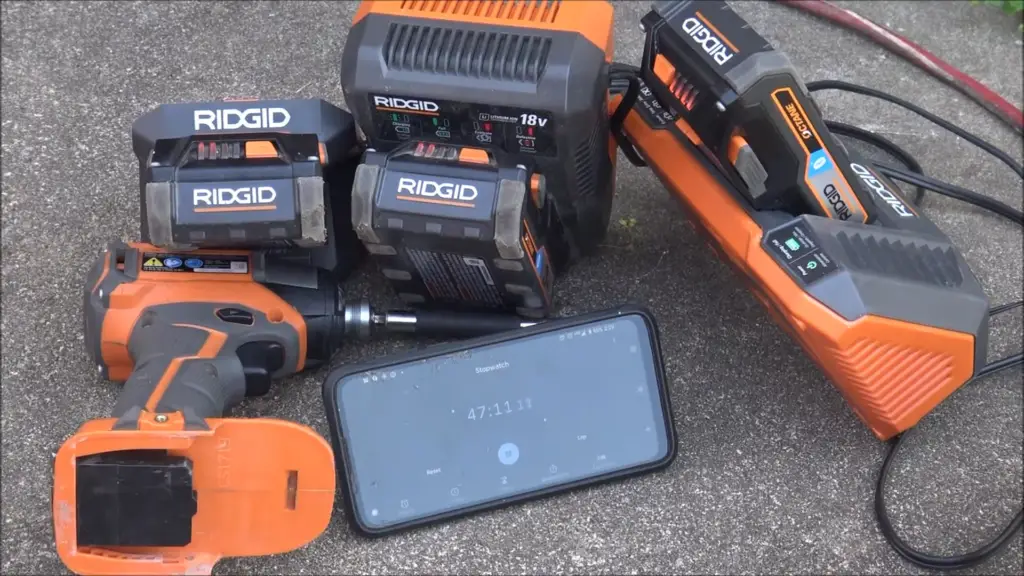
A charger’s functionality can be easily tested by connecting it to another 18V Ridgid battery. You can do this by following these steps:
Step 1: Set Up the Charger and Battery
The battery you are going to test must be half or fully charged, and the charger should not be connected to anything else.
Step 2: Connect the Charger to the Battery
Connect the charger to the battery and ensure that it is securely seated.
Step 3: Monitor the Charger’s Indicator Lights
There are lights on Ridgid battery chargers that show when they are charging and when the batteries are fully charged. Upon fully charged of the battery, the charger indicates the solid green light, and if the battery is in a charging state, the indicator lights turn to flash green.
Step 4: Disconnect the battery
Upon fully charging, unplug the battery from the charger and test it with a drill or other tool/device. An operating battery indicates that the charger is also fully functional and in a proper state.
Charging the battery without seeing any indication of how much power is being delivered may be a sign that the charger is defective. Similarly, if a battery is not holding a charge after being charged, the charger might be defective and needs to be replaced.
Fix # 3: Clean Terminals
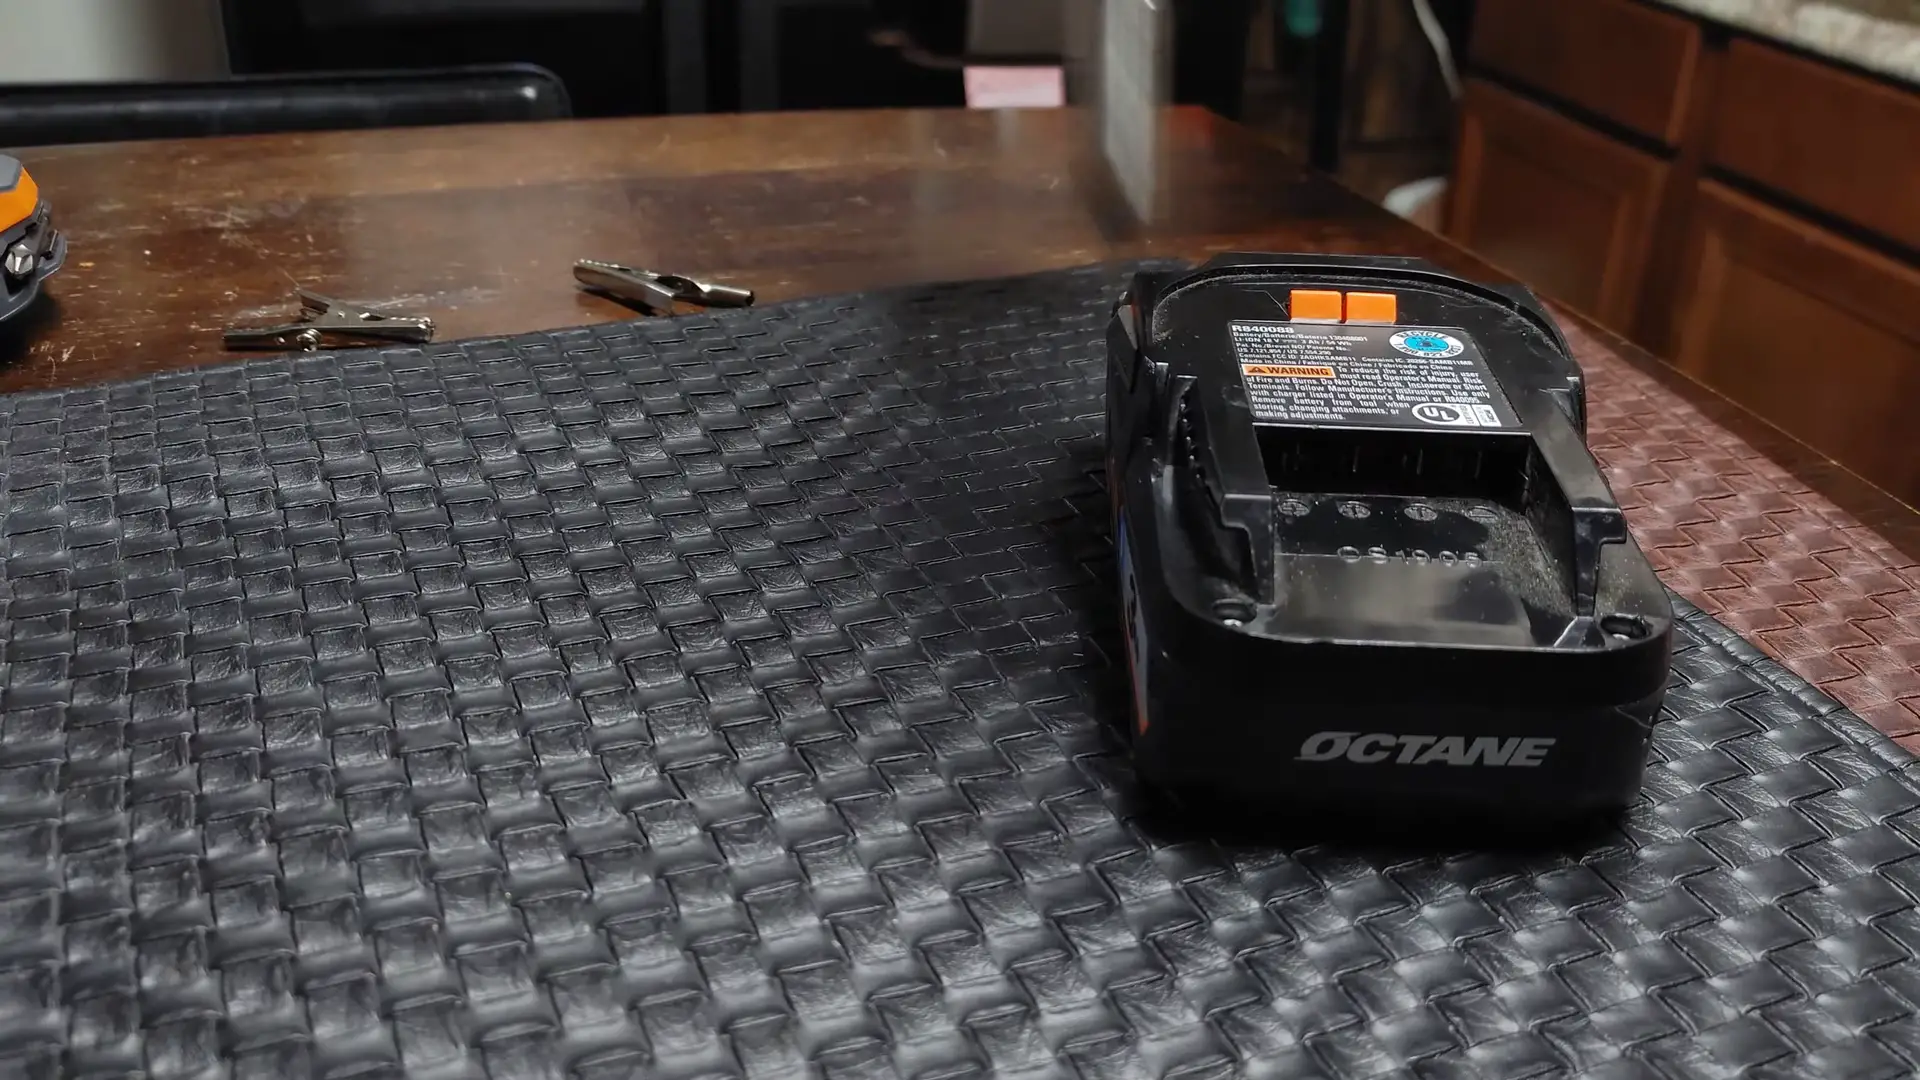
If the fixes mentioned above don’t work, now try this one; it can be helpful. The dust, corrosion, and debris might accumulate on the metal contact terminals of both the 18V Ridgid battery and the charger. Due to dust and corrosion, the terminals of the battery and charger don’t contact well.
It is essential to clean the terminals of your 18V Ridgid battery and charger to ensure proper charging, longevity, and productivity. Battery and charger lifespans can be shortened if both the battery and charger have dirty or corroded terminals. Here are the step-by-step instructions for cleaning your charger and battery’s terminals:
- Take the battery out of the charger and put it aside.
- Clean the battery terminals using a Q-tip/cotton bud dampened with rubbing alcohol or white vinegar. If there is any corrosion, you can gently scrub it off using sandpaper. Remove any residue by wiping the terminals with the vinegar-soaked Q-tip.
- To clean the terminals on the charger, follow the same procedure. Despite the charger terminals’ small size, and the difficulty of cleaning them, you can use a cone-shaped piece of folded sandpaper to reach them. To achieve the best results, dip the Q-tip and sandpaper into rubbing chemicals and then rub them on its terminals to wipe the corrosion and dust.
- You should dry the battery and charger terminals thoroughly with a clean, dry cloth. Don’t leave any residue or moisture on the terminals.
- Put the battery back into the charger and make sure that it is securely inserted.
- To check the battery’s charge and functionality, use it in a tool or device.
Fix # 4: Press the Toggle Latched when Inserting
In order to ensure proper charging of an 18V Ridgid battery, it is imperative that the toggle latched are pressed when inserting the battery into its charger. This mechanism ensures a good connection between the battery and charger by securely locking the battery in place. Unless the toggle latched are engaged, the battery may not charge properly or not at all. Whenever you insert an 18V Ridgid battery into its charger, you should press the toggle latches as follows:
- The toggle latches are typically located on the sides of the battery. They are orange-colored buttons on Ridgid’s 18V batteries. Different battery models may have different color buttons.
- Install the battery in the charger and ensure that it is securely fastened.
- When placing the battery in the charger, press the toggle latch until it clicks. The toggle latch must be engaged securely, ensuring that the battery and charger are appropriately connected.
- Generally, chargers indicate if the battery is charging and when it is fully charged with lights or digital displays. As soon as the battery is fully charged, the solid green light on the charger should change to indicate the battery is fully charged.
Inserting the 18V Ridgid battery into the charger with the toggle locked ensures the battery and charger are properly charged and maximize their longevity. Each time you charge your battery, engage the toggle latched to ensure the battery is being charged properly.
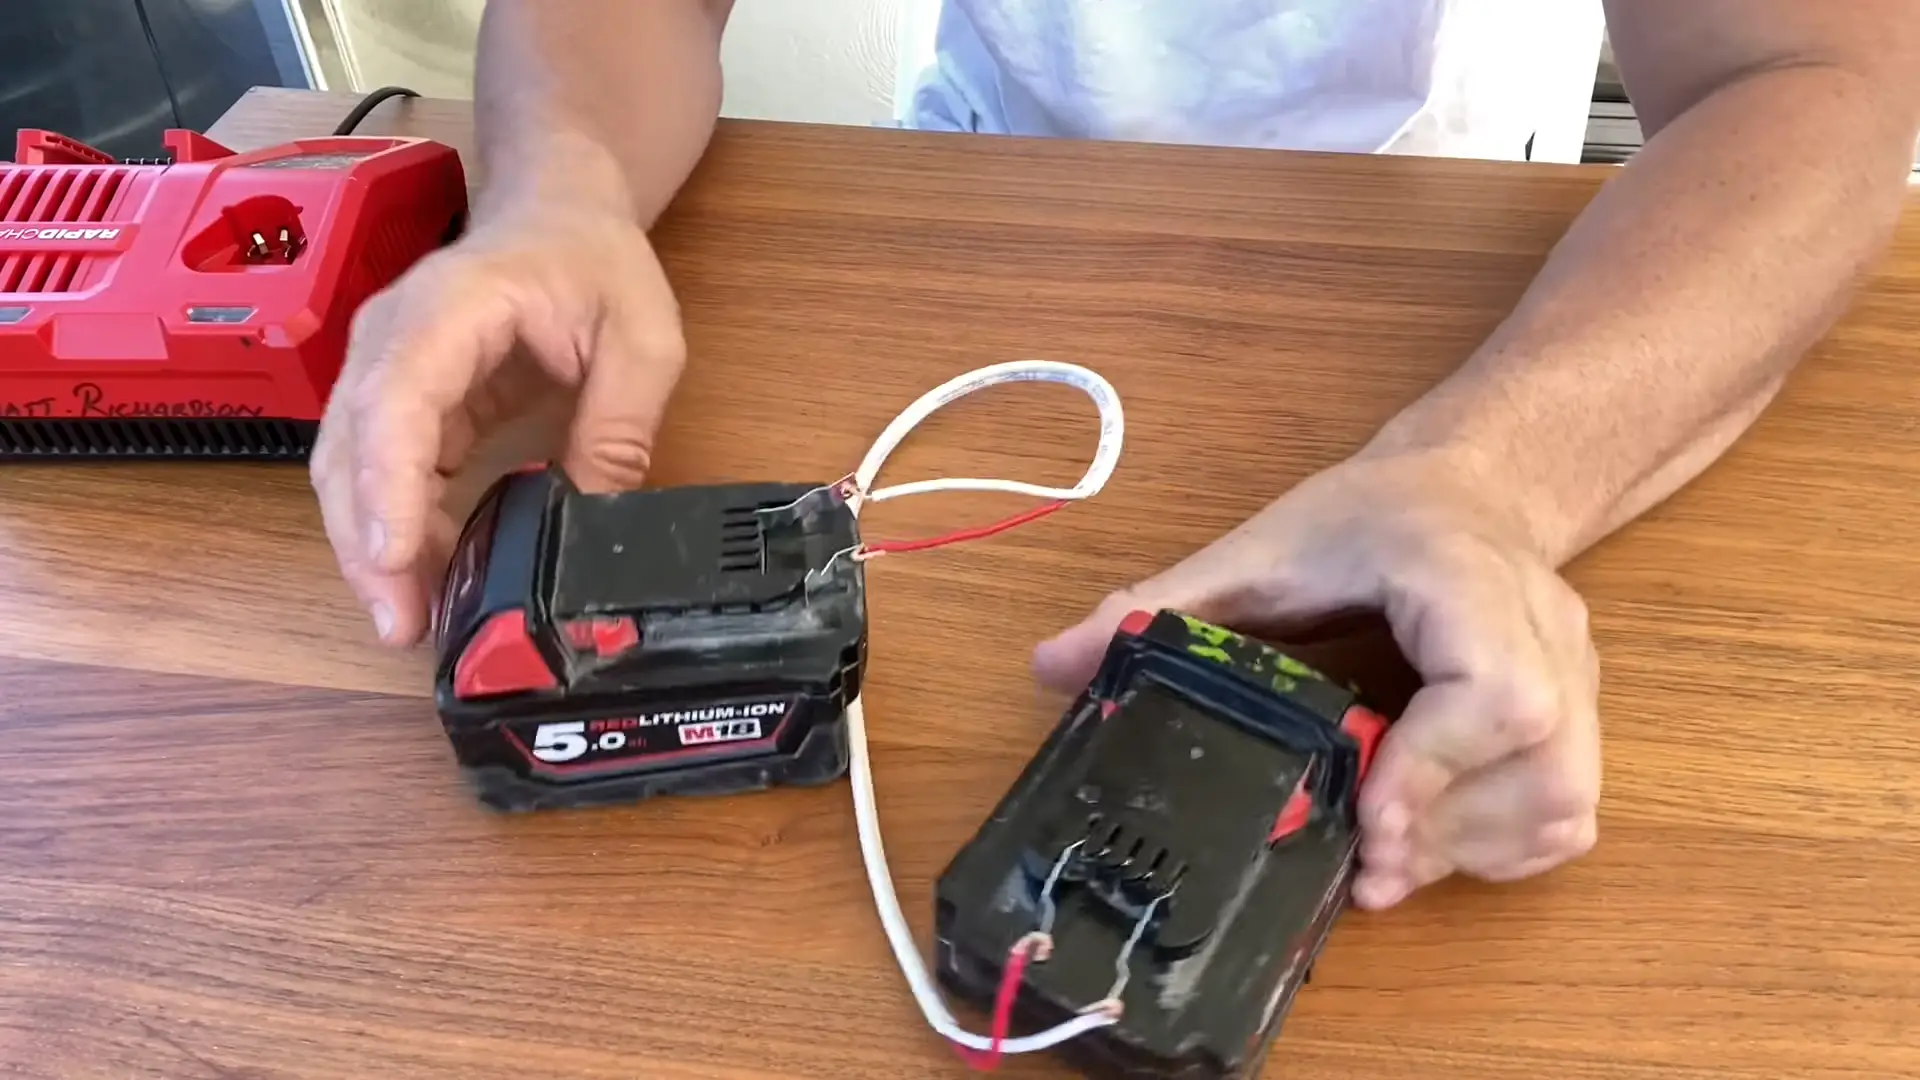
Fix # 5: Jump Start the Battery
When a battery is dead or depleted, jump-starting an 18V Ridgid battery restores its capacity to hold a charge again. Having your battery overcharged can cause it to die out if it’s been sitting unused for a long time or if it’s been exposed to cold temperatures. The market is full of various jump starters of different brands. Get a high-quality jump starter and follow the step-by-step instructions for jumping starting a Ridgid 18V battery provided below:
- It is necessary to have a fully charged jump starter and an 18V Ridgid battery.
- It is important to note that on every Ridgid battery, there is a positive side labeled “+” and a negative side labeled “-. “
- The jump starter connects its positive cable to the dead battery’s positive terminal.
- The jump starter’s negative cable should be connected to the dead battery’s negative terminal.
- Turn on the jump starter to start charging the dead battery.
- Check to see if the batteries hold a charge after removing the wires from both batteries.
- Test the depleted battery by putting in the tool and device.
Getting a dead or depleted 18V Ridgid battery to work again may be achieved by jumping-starting the battery. You can not only help bring the battery back to life but also extend its lifespan by jump-starting it. The battery may need to be replaced if it still cannot hold a charge after jump-starting.
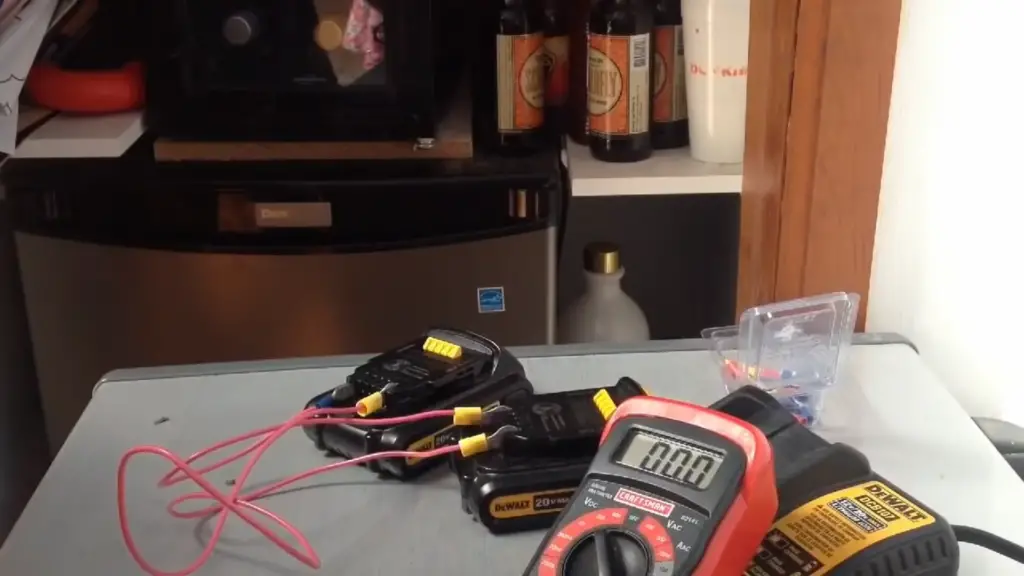
Fix # 6: Use Power Juice from Another Battery
A parallel connection between two batteries will allow you to use the power of another battery. A second battery will be recharged as a result of the power flowing from the first. You can do this by following these steps:
- Ensure that the voltage of the two batteries is the same. Battery damage can occur if they are connected in parallel with different voltages.
- Both batteries have positive and negative terminals. A “+” sign indicates the positive terminal, whereas a “-” sign indicates the negative terminal.
- Connect the positive terminals of the first and second batteries with the insulated wires.
- Similarly, make a connection between the negative terminals of the first and second batteries.
- After the wires are connected, the two batteries will be connected in parallel, with the first battery now supplying power to the second battery, which will charge it.
- Check to see if the batteries hold a charge after removing the wires from both batteries.
- Test the depleted battery by putting in the tool and device.
Fix # 7: Clean the Internal Chip
After trying all the methods, you can try this one to get your battery back into action.
- Take the 18V Ridgid battery and T10 screwdriver.
- The battery has 4 T10 screws on both of its sides.
- Unscrew all the screws by using a T10 screwdriver and open its upper and side lids as well.
- There is a specific chip engraved behind the light indicators.
- Clesn that chip with the Q-tip by using compressed air.
- Also, rub and clean the internal terminals of the battery.
- Put on the lid back and tighten the screw again to fill the lids properly.
- Now insert the battery into the charger.
- Hope it will be charging more effectively.
Try all the fixes one after another if the single one not works. But after trying all the methods, if your battery is still not charging, you have to replace or reset your battery.
Ridgid Battery Got Wet?
Ridgid batteries that get wet can damage their internal components as water enters the internal components. When this occurs, the battery’s performance and lifespan may be adversely affected and become completely inoperable.
If your 18V Ridgid battery is wet, follow these steps:
- Put the battery on a dry surface after removing the battery from the tool or device.
- Make sure all visible moisture is removed from the battery by wiping it down with a clean, dry cloth.
- In case moisture has accumulated inside the battery pack, open it and remove it. Alternatively, you can use a hairdryer on the lowest setting or a dry cloth.
- The battery may need to be air-dried overnight or for several hours to dry completely.
- Reassemble the battery after it has dried completely and charge it. Once it has been charged normally, it should be able to be used again.